Ria

Chicken Sausage Rice… inspired by Paella!

Paella is one of my favourite rice dishes... not only is it delicious, it is sort of a complete meal. At least the version that I make where I incorporate some vegetables into a mainly chicken and seafood dish. The other day when the craving for Paella hit me, I was in the midst of a project deadline and in no way able to spend the time to prepare it. Necessity is the mother of invention, right? I did come up with a dish which has chicken and sausages and resembled Paella enough to make my tummy happy. Win-win all the way! ch-sau-rice3 
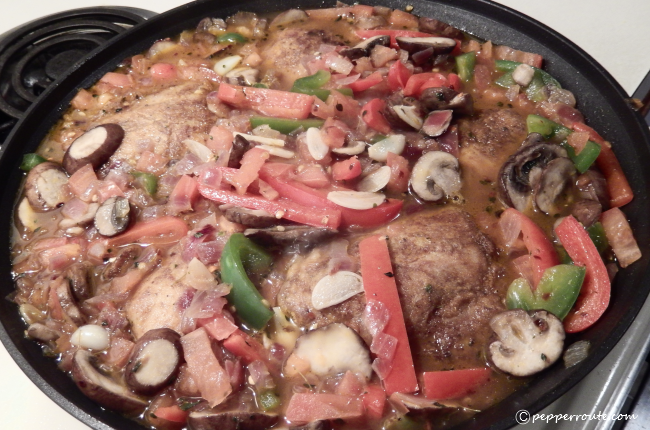
It is actually very simple... cook sausages and chicken separately. Chop some vegetables. Throw everything together along with some rice, and cook till done. Though I used hot Italian sausages, I think chorizo will be even better. chi-sau Any vegetables that will not go mushy will work. As this was not a planned-in-advance dish, I used the red peppers I had in the refrigerator. And of course, onions and garlic. Celery adds some additional flavour to the dish, but can easily be omitted. veg-mix The rice I used was regular long grained rice, but again, do you think Arborio rice would be better? Maybe next time I’ll try this dish with Arborio rice. And chorizos. ch-sau-rice1 Yeah, many ways to manage this dish with whatever ingredients you have handy! ch-sau-rice2

~Ria

Chicken Sausage Rice... inspired by Paella!
 
Author: 
Recipe type: Dinner
Ingredients
  • 2 lb skinless, boneless chicken, thighs and breasts mixed
  • 1 lb sausages
  • 1 large onion
  • 2 ribs celery
  • 4 cloves garlic
  • 1 tsp chilli powder
  • 2 tsp paprika
  • 1 tbsp coriander powder
  • ½ tsp cumin powder
  • 2 cups rice, Arborio or long grain
  • 1 large red pepper, or a mix of vegetables
  • 1 can (12 oz) crushed tomatoes
  • 1 can chicken stock (can be made from cubes or substituted with water)
  • Cooking oil, as required
  • Salt and black pepper to taste
Directions
  1. Cut the chicken into pieces and mix with chilli powder, paprika, coriander powder, cumin powder and salt. Leave aside in the refrigerator to marinate while you prepare the rest of the ingredients.
  2. Cut the sausages into bite size pieces.
  3. Wash and drain the rice and leave aside.
  4. Chop the onions and celery roughly. Slice the garlic thinly.
  5. Cut the vegetables into bite size pieces.
  6. In a large pan, heat 2 tbsp oil and fry the sausages. Drain on paper towels.
  7. In the same pan, add another 2 tbsp of oil and brown the marinated chicken pieces on all sides. Keep aside.
  8. Add 2 more tbsp oil to the pan and add the onions, celery and garlic. Fry till they turn transparent.
  9. Add the drained rice and fry for two minutes. Add the crushed tomatoes and chicken stock. Stir together. Add the sausages and chicken pieces to the mixture. Season with salt and black pepper.
  10. Bring to a boil and cover and cook for 15 minutes, checking after 10 minutes to see there is enough liquid in the dish. If not, add enough water to cook.
  11. When the rice is done, switch off the heat and let sit for another 10 minutes.
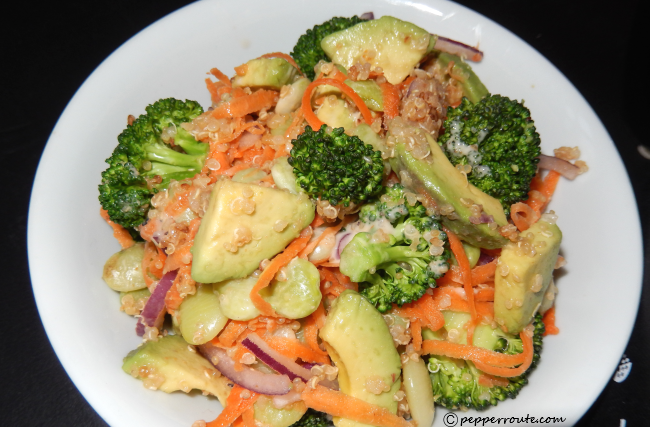
  12. Serve with a salad dressed with any creamy dressing. Quick and easy and delicious!

Verineki


When I used to work in downtown NYC, one of our lunch places used to be this Russian place on Fulton Street. Walking distance from work, it offered very good food. Recently, when I read a review of the book ‘Mastering the Art of Soviet Cooking’ in New York Times, I really wanted to try out some of those dishes. Fortunately, it was just a matter of sending out a request through email, for offers of authentic Russian cookbooks to be forthcoming. And today I made Varenikis, following a recipe in a book lent to me by my friend Olga. Thank you so much, Olga!
 
vareniki

Vareniki is a kind of dumplings, made of fresh dough. The dough is a simple one with flour and eggs. And then you fill it with stuff and boil it in salted water. In fact, the literal meaning of the word vareniki is just ‘boiled thing’!

vareniki-mix

Traditionally it has fillings like meat, cooked potatoes, sauerkraut, cheese, fruit etc. Here I have used a mixture of cheese and dried fruit filling.

vareniki-filling

The best part of it is, you can make whatever you want of it, with a variety of fillings. Now that I have successfully tried it, the next step would be to try out some new combinations of fillings!

vareniki-recipe

One fact common to all dumplings is that it is so easy to determine when they are done; they float up to the surface when done!

vareniki-floating

The recipe recommends serving the varenikis with sour cream, but I think it could go with many an interesting sauce or aioli. Next time…

~Ria

Verineki
 
Author: 
Ingredients
  • 2 cups flour
  • 2 eggs
  • 2 tbsp cold water
  • ½ tsp salt
  • ½ lb cottage cheese
  • ¾ cup sugar
  • 1 egg
  • 1tbsp butter
  • ½ tsp vanilla extract
  • ¼ cup raisins
  • ¼ cup glazed cherries
Directions
  1. To make the dough, mix the salt into the flour.
  2. Beat the eggs and cold water together, and add to the flour.
  3. Mix together and kneed into a smooth dough. Keep covered with cling wrap.
  4. For the stuffing, chop the raisin and cherries. Beat the egg.
  5. Mix cottage cheese, sugar, beaten egg, vanilla extract and chopped fruit together.
  6. Form small balls of the dough.
  7. Make a depression in the center of each of the dough balls with your thumb and fill with stuffing. Carefully, form into an oval shape.
  8. Bring water to boil in a pan, adding a teaspoon of salt to the water.
  9. When the water starts to boil, drop the formed varenikis carefully into the water. Let them cook for a few minutes.
  10. When done, the varenikis will float to the top. Lift them out with a slotted spoon and place on a plate.
  11. Brush them with melted butter. Serve with sour cream.

Meat-Vegetable Loaf

Today was a lovely day… first time the temperature crossed 70 this season. And I was in the mood for something on the lighter side for dinner. Like a piece of salmon with some lemon-habanero aioli… With that picture in mind, I set out for the grocery store. I was in the meat and fish section when I saw the shop assistant bringing out fresh ground turkey. Ground up is the best way I like to go with turkey, and it was so fresh. And all my plans underwent a sudden change; when I reached home from the grocery store, I had all the fixings for a meatloaf!meatloaf6

This is not truly a meatloaf… more like a meat vegetable loaf. I add a ton of veggies to the mix. Onion, celery, red and green peppers, green peas, brussels sprouts, green beans, broccoli… these can all go into it, in any combination. In fact, any vegetable that is not too watery like will work. You can use equal quantities of meat and vegetables.

meatloaf1

My combination of spices for this meatloaf are rosemary, thyme, dijon mustard, and red chilli powder. If it is summer and my herb garden is growing, I prefer to use the fresh herbs. If not, dried ones will do as well.

meatloaf2

So you chop up all the vegetables. And add them to the ground meat. Along with eggs, breadcrumbs and a bit of sour cream. And of course, salt and pepper for seasoning. The beauty of the whole scheme is that there is no hard and fast rule about what can and cannot go into this meatloaf. By the way, has anyone tried a veggie loaf? Could be an interesting thing to try out. 🙂

meatloaf3

By the time I had prepared the mix, there was more than could be accommodated in the loaf pan. Easy to pop the remaining mix into ramekins and bake into individual helpings. And these freeze beautifully.

meatloaf4

If one doesn’t want to use red meat, a combination of  turkey, chicken and pork will work well. This particular meatloaf I made with just ground turkey.

meatloaf5

Served on a bed of creamy mashed potatoes, with or without gravy, this meatloaf is absolute yum!

~Ria

Meat-Vegetable Loaf
 
Author: 
Ingredients
  • 2 lb ground meat (mix of turkey, chicken and pork)
  • 1 onion
  • 2 ribs celery
  • 1 red pepper
  • 1 green pepper
  • 1 handful of frozen green peas
  • 1 tsp rosemary (fresh or dried)
  • 1 tsp thyme (fresh or dried)
  • 2 tsp dijon mustard
  • 1 tsp red chilli powder
  • 4 large cloves of garlic
  • 2 eggs
  • 1 cup fine breadcrumbs
  • ½ cup sour cream
  • Salt and pepper to taste
  • Tomato ketchup for garnishing
Directions
  1. Preheat the oven to 350 degree F.
  2. Chop all the vegetables fine.
  3. Mince the garlic and herbs.
  4. Thaw the frozen green peas.
  5. In a large pan, mix together all the ingredients, seasoning well with salt and pepper. Be careful not to overmix.
  6. Place the mix into a loaf pan and form the top into a loaf shape.
  7. Garnish with tomato ketchup.
  8. Bake for 45 minutes. Check for doneness by inserting a skewer into the loaf. If it comes out clean, the loaf is done. If required, bake for another 10 minutes.
  9. Let cool for 10 minutes, before slicing. Any extra will freeze well.

Quinoa and Lima Beans Salad with Walnut Dressing

2013 was declared the ‘International Year of Quinoa’ by the United Nations General Assembly, with the objective drawing the world’s attention to the role that quinoa can play an important role in eradicating hunger, malnutrition and poverty.
 

red-black-quinoa

 
Official_Logo

So what is so special about quinoa?
 
For starters, quinoa is a complete source of protein that includes all nine essential amino acids. Imagine what a blessing it is to vegans who always have a problem about enough protein in their diets. While quinoa is low on calories and carbs, it is also gluten free and rich in fibre. Quinoa also contains minerals like magnesium, iron, tryptophan, copper, and phosphorous.
Its qualities are so much recognised that NASA includes it in the menu of its astronauts!
 
quinoa-salad1

Quinoa, pronounced ‘kinwah’ following its Spanish spelling, is the grain-like seed of a plant belonging to the spinach family. It was cultivated in the countries of Ecuador, Bolivia, Colombia and Peru, of the Andean region, 3,000 to 4,000 years ago. A staple in the area, quinoa has become increasingly popular world over in the last few years.
 
quinoa-salad2

Quinoa seeds have a bitter coating called saponin, which makes birds avoid them. In the case of most of the quinoa that is available today in the market, this coating has been removed. Still, it is better to wash it thoroughly before cooking it.
 
quinoa-salad4

You can cook quinoa the same way as rice. You can boil it in lots of water and then drain it. Or you can combine quinoa and water in a ratio of 1:2, bring it to boil, and simmer it till done and water absorbed, in around 15 minutes. For added flavour, quinoa can be toasted dry for five minutes over low heat and then cooked.
 
quinoa-salad5

Though quinoa can be used in many ways – quinoa burgers are quite tasty! – my favourite use for it is in salads. It is very versatile and you can add a lot of varied stuff to it to come up with interesting combinations. I like it best when I add a lot of my favourite things and come up with a satisfying meal in one dish!
The addition of lima beans, broccoli, carrots and avocados make this a complete, nutritious meal. The onions add flavour to the salad.
 
broccoli-onion
carrots-lima
 
And if you grind the dressing a bit coarse, it adds a bit of crunch too! And if you like the dressing on the spicier side, you can even add some red chilli flakes to it.

~Ria

Quinoa and Lima Beans Salad with Walnut Dressing
 
Author: 
Recipe type: Salad
Cuisine: International
Ingredients
  • Half cup quinoa seeds
  • 1 cup frozen baby lima beans
  • 1 head broccoli
  • 1 ripe avocado
  • 1 carrot
  • Half a small red onion
  • Half cup walnuts
  • Quarter cup olive oil
  • Two cloves of garlic
  • Salt and black pepper to taste
Directions
  1. Wash the quinoa thoroughly under running water and drain.
  2. Bring one and a quarter cup of water to a boil. Add a pinch of salt and the quinoa to the boiling water. Reduce heat, cover and cook for 15 minutes.
  3. Wash the frozen lima beans under running water to defrost it. Cook in a microwave with a pinch of salt and two tablespoons of water, for three minutes.
  4. Cut the broccoli head into florets. Cook in the microwave with a pinch of water and two tablespoons water, for two minutes.
  5. Scrape the carrot into longish strips.
  6. Slice the onion thinly.
  7. Cut the avocado into pieces.
  8. Soak the walnuts for 15 minutes. In a blender, add the walnuts and garlic and blend. With the blender running, add the olive oil in a steady stream. Transfer to a dish and season with salt and lots of freshly ground black pepper.
  9. To assemble, in a large bowl, toss together the quinoa, lima beans (drain off any excess cooking water from the lima beans and broccoli), broccoli, carrot, onion and avocado. Transfer to a serving bowl and drizzle the dressing over the salad. Serve the extra dressing along with the salad. Delicious!

Chicken Cacciatore

The other day, I was watching Lidia Bastianich (of Lidia’s Italy fame), on ‘CreateTV’, making chicken cacciatore. And I realised that I hadn’t made it for a while, though it was one of my quick go-to recipes a while back. To pick out the recipe from the file (I do keep a physical file of my favourite recipes!) and create a shopping list was just a five-minute job!
 
According to Lidia, the dish must have been based originally on some kind of wild game birds, as ‘caccia’ means ‘to hunt’ in Italian. Somewhere along the way, chicken replaced the wild game, and other tweaks happened as well I’m sure, and we have the modern day cacciatore!
 
ready1

Usually, this dish is cooked with a whole chicken cut up into large pieces. But I prefer to make it with bone-in chicken thighs. The uniform sized pieces make it easy to calculate the cooking time.
 
The way I use the garlic and red chillies in the original cacciatore recipe, is the unique twist to this version. And believe me, it makes a big difference. Marinating the chicken in a mix of finely crushed garlic and red chilli powder, instead of the chilli flakes, lets the flavour penetrate into the meat.
 
marinated-chicken

You can marinate the chicken in the refrigerator anywhere from one hour to 24 hours; the closer it is to 24 hours, the softer and more flavourful it is.
 
chicken

And mushrooms… though shitakes are preferred, I use portabellas in a crunch. Lots and lots of them. You can even do away with the stock as the juice of the mushrooms will add sufficient flavour to the dish.
 
onion-peppers

Whenever possible, I like to incorporate some vegetables into any dish I’m cooking. Here I have used red and green peppers. You could also use yellow/ green squash, brussels sprouts, green peas etc.
 
all-in-the-pan

Chicken cacciatore is very versatile in that it can be served with pasta, rice, or any other starch. I prefer mashed potatoes with a slice of crusty bread on the side to mop up the gravy. And a green salad on the side…
 
ready3
 

~Ria

 
Recipe for easy printing

Chicken Cacciatore
Ingredients
  • 2 to 3 lbs chicken, skinless thigh pieces
  • 6 large cloves garlic
  • 1 tsp chilli powder
  • ½ cup flour
  • 4 tbsp olive oil
  • 1 cup chopped onions
  • 1 cup each red and green pepper pieces, cut lengthwise
  • 2 cups sliced mushrooms, shitake or portobello
  • 2 cups tomato pieces, seeds and pulp removed
  • 1 cup dry white wine
  • 2 cups chicken stock
  • Salt and pepper, to taste
  • A few springs of fresh thyme
  • Fresh basil leaves
Directions
  1. Crush the garlic finely and mix with the chilli powder and enough salt and sprinkle all over the chicken pieces and rub in well to coat. Keep aside for at least an hour (up to 24 hours) in the refrigerator.
  2. Season the flour with salt and pepper, and dredge the chicken pieces in the flour.
  3. Heat 4 tablespoons olive oil in a wide pan. Add the flour dredged chicken pieces to the oil and fry till browned on both sides, about 3 minutes per side. Note: If there is more chicken than can be accommodated without crowding in the pan, fry them in batches.
  4. Drain the chicken pieces on a plate. Into the same pan, add the chopped onions and stir fry till they start to wilt.
  5. Add the mixed vegetables and cook for two minutes.
  6. Add the mushrooms and let it cook for five minutes.
  7. Now add the wine, bring to a boil and cook for 3 minutes.
  8. Add the stock, tomatoes, and thyme.
  9. Place the chicken pieces back into the pan. Add enough salt and mix everything together. Cover and cook for 20 minutes.
  10. At the end of 20 minutes, the chicken pieces should be done, with enough liquid to coat the pieces. If there is more liquid, cook uncovered to let the extra liquid evaporate. If there is not enough liquid, add enough stock or water and allow it to boil for 2 minutes.
  11. Add the fresh basil and stir. Serve with pasta, brown rice, or mashed potatoes.


A pie for Pi Day!

March 14th, as you know, is Pi Day worldwide, a day on which math enthusiasts celebrate the constant 3.14, the ratio of the circumference of a circle to its diameter. One way to celebrate the day is to have pie parties, or at least make and eat pies! And to join in with the spirit of celebrations, that is what I decided to do too... make a pie!   pot-pie-slice Having been gorging on all kinds of sweet stuff during my recent vacation, my choice for this occasion was a pot pie... a vegetarian pot pie! A lot of veggies can go into this pie...   pot-pie-veg The key ingredient that gives this pot pie a unique kick up is ginger root! And instead of using a roux to thicken the filling, I like to use coconut milk which is healthier and adds to the flavour and creaminess of the filling.   And you can prepare the dough ahead of making the pie, and keep it chilled in the refrigerator up to 24 hours.   pot-pie-dough This pie makes a very good winter meal. And the leftovers will freeze very well too.   finished-pie

~Ria

Recipe for easy printing 
A pie for Pi Day!
 
Author: 
Ingredients
  • 1 large potato, peeled and cut into 1” pieces
  • 1 large onion, cut into small wedges
  • 4 ribs of celery, cut into small pieces
  • 3 cups mixed vegetables (red and green peppers, carrots, brussels sprouts) all cut into bite-size pieces. Peas too, but don’t cut them!
  • 2” piece ginger root, cut into thin juliennes
  • 1 can Coconut milk (available in Asian/ Mexican markets)
  • Salt & black pepper
  • 2 cups all purpose flour
  • Salt to taste
  • 1 stick (8 tbsp) butter, chilled in the refrigerator
  • Ice cold water
Directions
  1. To make the pie crust, mix together the flour and salt. Cut the chilled butter into small pieces and add to the flour, shaking to coat each piece. Using a pastry blender, cut the butter into the flour till the butter is reduced to pea sized bits. Sprinkle ice cold water on the flour and mix till you can just about form a loose dough. Shape the dough into a flat disk, cover with cling film and chill in the refrigerator.
  2. To make the filling, in a heavy bottomed pan, cook the potato, onion, celery and ginger with a half cup of water. When the potato is half done, add the rest of the vegetables, coconut milk, and enough salt. Cover and cook till everything is done.
  3. While the pan is still on the stove, mash a few of the potato pieces using the back of a wooden spoon to thicken the liquid in the filling. Add freshly ground black pepper to taste. Allow the filling to cool.
  4. When cool, transfer the filling into a 9” pie pan.
  5. Pre-heat the oven to 350 degree fahrenheit.
  6. Roll out the dough into a thick circle slightly larger than the pie pan. Gently lift the rolled out dough on the rolling pin and lay it over the pie pan with the filling. Fold under any extra dough and crimp with the edges. Make a few cuts in the dough to allow steam to escape.
  7. Place in the center of the oven and bake for 40 minutes. When the top starts to get slightly brown, take the pie out of the oven. Allow to cool for 10 minutes before cutting the pie.