Salad

Green Apple and Manchego Salad

Usually, cheese in a salad refers to some crumpled feta or mozzarella sprinkled on top. But to build an entire salad based on a cheese? You need an exemplary cheese for that and Manchego fits that bill to perfection!
 
GAMS-closeup1

Manchego cheese is made from sheep’s milk, and has a firm and compact, yet creamy, texture. It is light yellow in colour with a minimum fat content of 6.5% and protein content of 4.5%. A wheel of Manchego cheese is barrel-shaped, with a height of 12 cm and a diameter of 22 cm. It is a cheese that has been made for thousands of years, without any changes in the ingredients.
 
GAMS-done1

Traditionally, the cheese was made in plaited grass baskets, which left a pattern of zig-zag weaving on the outside of the cheese. In modern times, this pattern is achieved using a mould which has a relief pattern on the inside. The top and bottom surfaces have the imprint of an ear of wheat as well.
 
A Manchego cheese has to be aged for a period of 2 months to 2 years, in the natural caves of the region. Based on the aging time, Manchego cheeses are categorised as Semi-curado (up to three months of aging), Curado (three to six months), and Viejo (one year to two years). The longer the cheese ages, it gets firmer and develops a complex flavour.
 
GAMS-closeup2

During the process of maturing, a natural rind is formed around the cheese. This rind is not edible, but official rules do not allow this rind to be removed before sale.
 
Manchego cheese is made only in the La Mancha region of Spain, from the milk of the Manchega sheep. Remember La Mancha? It is the setting for the epic novel ‘Don Quixote’ by Miguel de Cervantes. Actually, the full title of the book is, ‘The Ingenious Gentleman Don Quixote of La Mancha’.
 
GAMS-closeup2

La Mancha is a geographical region, a high plateau that extends to the south of the capital city Madrid reaching up to the Sierra Morena mountain range of the Iberian peninsula. Most of the plateau is not suitable for agriculture due to its arid climate and the rocky terrain which allow only hardy plants to grow. The original name given to the region by the Arabs who lived in the area thousands of years ago, was Al Mansha, meaning ‘waterless land’. The unique plants and herbs that the Manchega sheep live on are the reason for the cheese’s distinctive flavour.
 
GAMS-closeup3

Artisanal Manchego cheese is handmade by farmers from raw milk while commercially produced varieties are made from pasteurised milk. It is difficult to get the artisanal variety outside of Spain, though. Yep, one more thing to look forward to, in Spain!
 
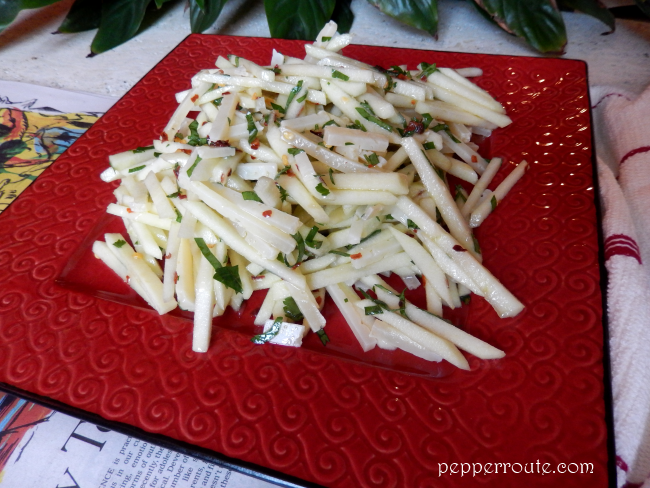
This salad, it is so simple. It has two ingredients and a dressing with three.
 
GAMS-ingredients1

If you can wield a knife, you can make this. But believe me… it doesn’t taste simple at all.
 
GAMS-ingredients2

The gelling together of the ingredients result in a delicious dish, which can be a side or a snack.
 
GAMS-done2

Or, even a lunch!
 
Note: I have eaten this salad without adding any salt and it tastes great.

~Ria


Green Apple and Manchego Salad
 
Author: 
Recipe type: Salad
Ingredients
  • 8 oz Manchego cheese
  • 2 Granny Smith apples
  • 1 tbsp chopped parsley
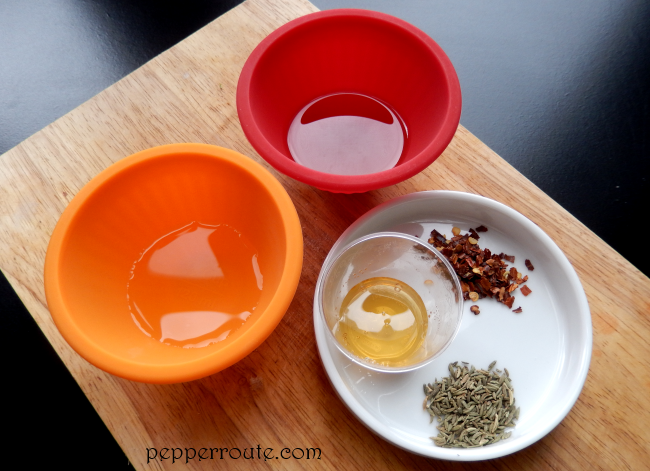
  • 1 tsp red chilli flakes
  • 3 tbsp extra virgin olive oil
  • Salt to taste
Directions
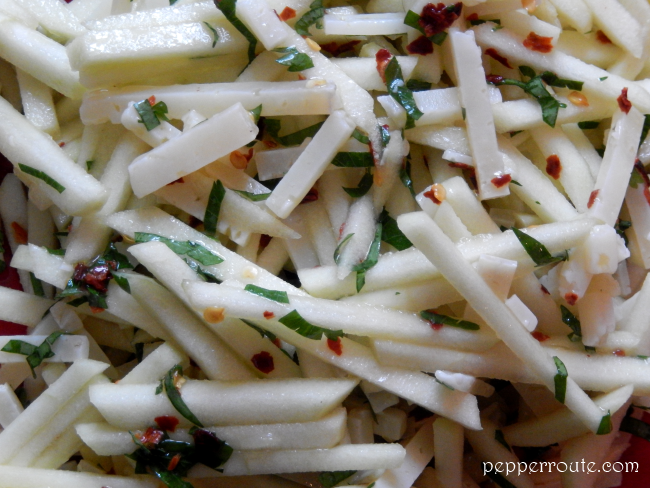
  1. Cut the cheese into matchstick sized pieces.
  2. Peel and core the apples. Cut them into matchstick size as well.
  3. In a bowl, combine the cheese and apple pieces.
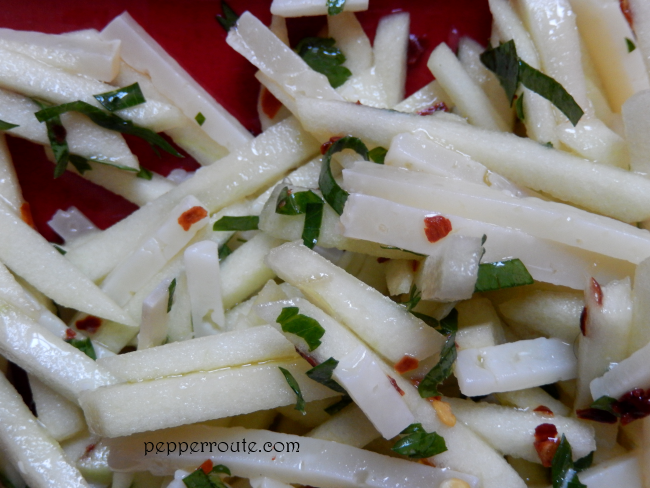
  4. Sprinkle chopped parsley and red chilli flakes over the mix.
  5. Add salt as required.
  6. Drizzle the olive oil over the mix.
  7. Toss well and serve right away.


Green Apple and Potato Salad with Arugula and Goat Cheese

The name says it all… potato, green apple, arugula, goat cheese… what more could you ask for, in a salad? But there is still more… roasted walnuts and a tangy, spicy dressing to top it all! Honestly, this is one of the easiest and tastiest of salads that I have ever made or eaten!
 
PGA-closeup

Though any variety of potatoes can be used in this salad, red potatoes have proved to be the best choice. Also, crispy, tangy granny smith apples go very well with the red potatoes.
 
PGA-ingredients1

Arugula is my favourite salad leaf. Not ‘one of’, but ‘the’! Sometimes I keep some in a dish and keep munching on the leaves as I go about my cooking. This lovely green with a peppery flavour is full of phytochemicals, anti-oxidants, vitamins, and minerals!
 
PGA-done2

Goat cheese is the perfect counterfoil for the sharpness of arugula. Add some walnut for crunch, and you got an absolute winner.
 
PGA-ingredients2

A simple lemon juice and olive oil dressing with a tiny bit of honey is kicked up with crushed cumin and a tiny pinch of red chili flakes. Shake together the lot, and the fabulous dressing is ready in two minutes!
 
PGA-potato

This salad is assembled layer by layer starting with the boiled potato slices. After placing each layer, add some of the dressing on top the layer and continue with the next layer.
 
PGA-done

Potatoes, apple pieces, arugula, goat cheese, and walnuts at the top.
 
PGA-mid1

And end with a drizzle of the remaining dressing.
 
PGA-mid2

It’s not a good idea to keep this salad for long – in or out of the refrigerator. So you should keep all the ingredients ready – even make the dressing – and assemble it just before serving.


~Ria

Green Apple and Potato Salad with Arugula and Goat Cheese
 
Author: 
Recipe type: Salad
Ingredients
  • 4 medium sized red potatoes
  • 1 granny smith apple
  • 1 cup arugula leaves
  • ¾ cup goat cheese
  • ½ cup walnuts
  • 2 tbsp lemon juice
  • 3 tbsp olive oil
  • 1 tbsp honey
  • ½ tsp cumin
  • ½ tsp red chili flakes
Directions
  1. Boil the potatoes in salted water, with the skin on and keep aside.
  2. Cut the apple into bite sized pieces.
  3. Dry roast the walnuts till they start to turn golden brown around the edges.
  4. Mix together the lemon juice, olive oil, and honey.
  5. Crush the cumin coarsely and add to the dressing mix, along with the red chili flakes and mix thoroughly.
  6. Slice the boiled potatoes thickly and place on a salad platter.
  7. Using a pastry brush, brush the dressing on the potato slices.
  8. Add the apple pieces, arugula and goat cheese bits, adding some dressing after each layer.
  9. Toss the roasted walnuts on top and drizzle the remaining dressing over them.
  10. Serve the salad at room temperature. Yum!


Moroccan Wild Rice Salad

A salad that is full of flavor and a combination of healthy ingredients… at the same time filling enough that you won’t be looking for something to eat in 45 minutes! That is what this Moroccan wild rice salad is! Starting with a base of varieties wild rice, it goes on to build up the goodness with garbanzo beans, vegetables, dry fruits and nuts. A generous dressing that combines multiple flavors completes the dish to end up with a complex flavourful, and satisfying meal in itself!
MWS-closeup1
I had bought this bag of wild rice mix, consisting of red, black and brown rices. Since then, it has become a sort of go-to ingredient to me for adding heft to simple salads. This salad started the same way, but turned into something that was much more interesting than a simple salad.
MWS-done-half
A rice and beans combination is always a good base to start. And again, I went with my go-to beans variety… the garbanzo beans. For vegetables, I chose what came in handy – zucchini, peppers, tomato and red onion. Unfortunately, I only had green peppers in the refrigerator, but am sure the use of multi-hued peppers would have looked better. Dried apricots and raisins add a touch of sweetness to the mix.
MWS-ingredients
This theme of tartness and sweetness is repeated in the dressing too… with rice vinegar, lemon juice, and honey. And soy sauce to flavor the base.

However, the dry spices used in the dressing are the key to the smoky, zesty flavour of the whole dish, along with a bunch of cilantro leaves that add a tangy freshness. These spice powders are dry roasted to bring out their fragrance.
MWS-liquid-ingredients
Though the dish has a longish ingredient list, the process is quite simple.

Mix all the chopped up vegetables and dried fruits with cilantro and the beans.
MWS-ingredients-in-bowl
Cook the rice with the soy sauce.
MWS-rice-done
Mix together the dressing ingredients.
MWS-mixing1
Add the rice and vegetable-beans mixture to the dressing.
MWS-mixing2
Garnish with almond slices, and the salad is ready to go!
MWS-done-whole
Looks pretty when served on a bed of lettuce leaves with wedges of lemon.
MWS-closeup2
This keeps very well in the refrigerator for up to 24 hours. Only, remember to bring it to room temperature before serving.


~Ria

Moroccan Wild Rice Salad
 
Author: 
Recipe type: Salad
Ingredients
  • 1 cup mixed wild rice
  • 3 tbsp soy sauce
  • 1 green or yellow zucchini
  • 1 cup cooked garbanzo beans, from a can
  • 1 green pepper
  • 1 tomato
  • ½ red onion
  • ½ cup dried apricots
  • ¼ cup raisins
  • 1 bunch cilantro leaves
  • 1 tbsp coriander powder
  • ½ tsp turmeric powder
  • 1 tsp curry powder
  • ½ tsp red chili powder
  • 2 tbsp rice vinegar
  • 2 tbsp lemon juice
  • 1 tbsp honey
  • ¼ cup almond slices and1 lemon, to garnish
  • Lettuce leaves, to serve
  • Salt to taste
Directions
  1. Cut the zucchini into bite sized pieces.
  2. Cook the wild rice, according to package instructions, along with the soy sauce and salt to taste.
  3. When the rice is cooked, turn off the heat and place the zucchini pieces on top of the rice. Cover the pan and let it rest for 10 minutes.
  4. Thinly slice the red onion, pepper and tomato.
  5. Slice the apricots thinly.
  6. Chop the cilantro.
  7. Mix together the vegetables, garbanzo beans, sliced apricots, raisins, and chopped cilantro.
  8. Set a frying pan on low heat and dry roast the coriander powder for 1 minute.
  9. Add the turmeric powder and continue roasting for another minute.
  10. Add the curry powder and chili powder and remove from the heat and keep stirring till cool.
  11. In a large bowl, mix the rice vinegar, lemon juice and honey.
  12. Add the roasted powders and mix well to make the dressing.
  13. Add the cooked rice to the dressing. Mix well.
  14. Add the vegetables-beans-fruits-cilantro combination and mix well.
  15. Serve on a bed of lettuce leaves, garnished with almond sliced and lemon wedges.

Sweet and Spicy Fruit Salad

Before long, summer will be gone, summer harvests will be gone too. No more fresh fruit from the farmers’ market. And I’m determined to make the best of the last chance foods before they are gone behind the colours of the arriving autumn. Salads, salads… and lots of fruits, that is my motto for now.

SSFS-closeup1

This particular salad is aimed at doing just that. Just lots of fruits, in a simple dressing. Nothing complicated, but the effect and the flavour of the combined fruit and the dressing is awesome.

SSFS-basket1

This can be a dessert after a meal, or half a brunch or even a lunch with a slice of frittata or an omelette added.

SSFS-fruit-closeup

So we start with the fruit. Any type of fruit, even slightly sour ones like kiwis, will work well in this salad.

SSFS-basket2

Most of the fruits I used are fresh, except for pineapple and oranges which came out of cans. And the liquid in which they were preserved in is not used.

SSFS-fruit-addition1

I started with pineapple cubes, orange segments, and a pink lady apple…

SSFS-fruit-addition2

Some ripe cherries, a golden delicious apple, and kiwis…

SSFS-fruit-addition3

Continuing with peaches and plums, bananas, and finally strawberries. That’s it; all the fruit in.
Now about the dressing…

SSFS-spice-mix

I used a pinch of red chilli flakes and a bit of chat masala, which is available in Indian grocery stores. If not, you can just use finely crushed cumin and black pepper. Juice of a fresh lime and some honey. That completes it.

SSFS-finished

Add all the dressing ingredients to the fruits along with the lime juice and honey. Mix well. Finally, chill in the refrigerator for 30 minutes at least.

SSFS-closeup2

And done! Yummy spicy sweet fruit salad is ready!


~Ria


Sweet and Spicy Fruit Salad
 
Author: 
Recipe type: Salad
Ingredients
  • Different fruits, at least 5 or 6 varieties
  • ½ tsp red chilli flakes
  • 1 tsp chat masala (can be replaced with ground cumin and black pepper)
  • 1 fresh lime
  • 2 tbsp honey
Directions
  1. Prepare the fruit as required.
  2. Cut the fruit into bite sized pieces.
  3. Sprinkle the red chilli flakes and chat masala over the fruits.
  4. Squeeze the lime and add the juice to the honey.
  5. Pour the mix over the fruit.
  6. Mix well carefully, without crushing the fruits.
  7. Serve garnished with sprigs of fresh mint.


Shrimp and Avocado Salad with Cherry Tomatoes

There is this funny story about how humans first started cooking their meat… how a barn got burned down along with the animals in it and the sad owner burned his finger when he poked a dead (and apparently perfectly cooked) animal… and put the finger in his mouth… and went yummm… but I have not heard a story about how we started eating shrimp. Only thing I can say is, whoever started the trend, he or she must have been a courageous soul! To look at one of those grumpy looking things with all spindly legs and stalk eyed stare and think… “umm… that must taste lovely!” would have taken a truly adventurous mind.
 
Whoever it was, I’m eternally grateful to that person. For, that indeed tastes lovely! In fact, shrimp is the favourite of a majority of pescetarians.
 
The name ‘shrimp’ is used to describe a wide variety of species, often synonymously with ‘prawn’, though technically prawns are the larger cousins of shrimp. These days more than half of the shrimp in the commercial market is farmed and rather than caught in the wild.
 
SAS-closeup
 
Shrimp figures prominently in many cuisines like Chinese, Italian and Mexican. And the ways in which it can be prepared are so numerous. Elaborate preparations with complex flavours or simple salads with a basic dressing… shrimp can be the starring presence in any of them!
 
SAS-shrimp-avocado-peas
 
Here I combined the shrimp with avocado in a salad – a winning combination any day – along with some sugar snap peas.
 
SAS-grapes-zucchini-scallions
 
And cherry tomatoes to add some colour, zucchini for a bit of body, and scallions for a mild heat.
 
SAS-dressing-ingredients
 
Crushed garlic, dijon mustard, balsamic vinegar and olive oil make up the simple dressing.
 
SAS-dressing-mixing
 
Mix together all ingredients except the olive oil and slowly add the olive oil last and mix thoroughly.
 
SAS-mixed2
 
It is an easy salad to make… just gently mix together all the prepared ingredients.
 
SAS-mixed
 
You have to be careful though, not to get the avocado pieces mushed by too much mixing.
 
SAS-done2
 
Last step, just pour the creamy dressing over the mixed salad.
 
SAS-done1
 
Ready to serve! A hearty salad willing to step in for a lunch any day!


~Ria


Shrimp and Avocado Salad with Cherry Tomatoes
 
Author: 
Recipe type: Salad
Ingredients
  • 12 -15 medium shrimp
  • 1 medium avocado
  • ½ lemon
  • 1 cup sugar snap peas
  • 1 cup cherry tomatoes
  • 1 small zucchini
  • 1 bunch scallions
  • 2 tsp Dijon mustard
  • 2 cloves of garlic
  • 1 tbsp balsamic vinegar
  • 3 tbsp olive oil
  • Salt and pepper to taste
Directions
  1. Prepare the shrimp leaving the tails on.
  2. In a pan, cook the shrimp, covered, adding two tablespoons of water and a pinch of salt, for 4 to 5 minutes, till all water is evaporated. Keep aside.
  3. Deseed the avocado and cut into bite size pieces. Squeeze the lemon over the avocado pieces to prevent discolouration.
  4. Bring a pot of water to boil and add 1 teaspoon of salt. Add the sugar snap peas to the boiling water and cook for three minutes. Drain and place in iced water right away. When thoroughly chilled, drain and keep aside.
  5. Cut the zucchini into bite size pieces. Place in a microwave safe dish with a pinch of salt, and sprinkle with a little water. Microwave for two minutes.
  6. Slice the scallions into thin rounds.
  7. Mix together the crushed garlic, mustard and balsamic vinegar. Slowly drizzle the olive oil and mix thoroughly. Season with salt and pepper.
  8. In a large bowl, mix together shrimp, pieces of avocado and zucchini, peas and sliced scallions. Add salt and pepper as required.
  9. Pour the dressing all over the mix and gently stir together.
  10. Chill in the refrigerator for an hour.
  11. Ready to serve!


Oranges and Beets on Wild Rice – a Picturesque Salad

The most versatile among the food grains, rice is the staple food of over half the world’s population. It is the largest cultivated crop and provides more than one fifth of the calories consumed worldwide by humans.

Rice cultivation originated in the Pearl River Valley of Chine, close to 10,000 years ago. From there, it spread to countries in South and Southeast Asia like India, Sri Lanka and Indonesia. Legend has it that is was the soldiers of Alexander the Great that brought this grain to Europe. And when Europeans started the colonization of the American continent, rice reached there too.

There are many varieties of rice available today, each one suitable for particular ways of cooking. Like basmati for a pulav or arborio for a risotto. And if we start talking about the many many dishes that can be made out of rice, we will be here a long time. 🙂

BOWR-closeup2

However, when I consider rice dishes, a salad was the last thing that came to my mind. That is, until recently. Ever since I came upon this fantastic salad made out of wild rice, it has become one of my favourites. Of course, over the course of preparing it many times, I have tweaked it quite a bit to get it to a state of perfection.

Wild rice, by the way, is in no way related to the rice plant. It is the seeds of a semi-aquatic grass that grows in lakes and river bays, in waters two to four feet deep. These grain like seeds used to be gathered and consumed by the native American tribes. Wild rice farming is of rather recent origin.

Interesting to note, wild rice is Minnesota’s state grain. And within the state, the non-farmed wild rice can be harvested only in the traditional way, without the use of any machinery.

BOWR-rice-beets-orange

Wild rice is most appreciated for its rich nutty flavour, which works well even when combined with other rice varieties. For this particular salad, I used a mixture of wild rice, red and brown rice and some black Japonica rice.

BOWR-dressing-ingredients

The dressing is rather creamy, the main ingredient being cream cheese. Balancing the creaminess, is the spiciness of the whole grain mustard and red chilli flakes, the crushed garlic and orange zest adding to the flavours.

BOWR-dressing-mixing

A bit of light cream is used to make the dressing easier to pour. But it should not be too liquidy either.

BOWR-dressing-done

The best part of this salad is to build it up. Start with the endive leaves on a serving platter. They should be placed close enough, but not overlapping. The idea is to ensure that you can life each leaf individually with the stuff piled on top of it.

BOWR-endive

Now place the cooked rice, covering the lower half of the leaves.

BOWR-endive-rice

Pour some of the dressing over the rice. And do resist the temptation to scoop it up already! (I’m speaking from experience!)

BOWR-endive-rice-dressing

Next is the turn of the beets and oranges. Pile them up on top of the rice.

BOWR-endive-rice-beets-orange

They do look pretty, don’t they?

BOWR-endive-rice-beets-orange-closeup

More dressing on top; and a few chives snipped on top completes the salad.

BOWR-finished

This salad can be eaten as a lunch on its own or can be served before a hearty meat main course.

BOWR-closeup

Light and refreshing, yet filling too!

~Ria


Oranges and Beets on Wild Rice – a Picturesque Salad
 
Author: 
Recipe type: Salad
Ingredients
  • 1 cup wild rice or mix of rice including wild rice
  • 2 medium beets
  • 1 can (12 oz) orange segments
  • 2 hearts of endive
  • 3 tbsp cream cheese
  • 3 tbsp light cream
  • 1 ½ tsp whole grain mustard
  • 1 ½ tsp orange zest
  • 1 garlic clove
  • A pinch red chilli flakes
  • A few sprigs of chive
  • Salt and pepper to taste
Directions
  1. Cook the rice according to directions on the packet.
  2. Skin the beets and cut them into ½ inch cubes.
  3. In a pan of salted water, boil the beets until tender. Drain and keep aside.
  4. Drain the can of oranges and keep aside.
  5. Separate the endives into leaves.
  6. Crush the garlic clove.
  7. Mix the cream cheese with mustard, orange zest, crushed garlic, and chilli flakes.
  8. When thoroughly mixed, add the cream a little at a time till the desired consistency is reached. Season with salt and pepper to taste.
  9. In a serving platter, arrange the endive leaves in a single row, forming a border.
  10. Place the rice on the leaves, covering their lower half.
  11. Pour two table spoons of dressing over the rice.
  12. Mix the beets and oranges gently, and add to the platter, on top of the rice.
  13. Pour the remaining dressing over the top.
  14. Garnish with snipped chives and get ready for compliments!

Zucchini and Peppers Salad with Pasta

Remember those silly things that teenagers keep saying? Correction, that we all used to say as teenagers? ‘Life without you is like a night without a moon… like peanut butter without jelly…’ and so on. I got a new one… life without you is like a summer without Freon! Why this sudden focus on a chemical gas? My air conditioner is out of Freon and I’m feeling the impact of the summer heat inside the house! 🙂 It is not terribly terrible – yet – though enough to make me look for ways to minimize time in the kitchen. One solution will be to eat more salads. But the simple green salads only make me more hungry. I need salads with some heft in them… So here I was looking forward to devising some interesting salads!

ZPSP-plated3

When you think about salads of substance, the first that come to mind are pasta salads. Okay, actually one thinks of potato salad first, but I have written about it very recently; so let’s go with a pasta salad. Good thing about pasta salad is that you can add a lot of stuff into it to make it interesting. And I wanted them fresh.

ZPSP-mixed2

So a saunter to the local farm market later, it was clear what was going into the salad. Green and orange peppers and zucchini… perfectly matches the colours of the pasta! And cherry tomatoes and onions are always in the refrigerator.

ZPSP-vegetables

An easy way to add vegetables to a pasta dish, and keep them crispy. You boil the pasta as usual in salted water… and just two minutes before it will be ready, you turn up the heat to bring the water to a rolling boil.

ZPSP-cut-vegetables

Throw in the cut vegetables that need cooking and wait for exactly 1 minute. Pour the whole thing into a colander, followed by a handful of ice cubes.

ZPSP-with-ice

Swirl together to ensure that the ice is moved around cooling things down quickly. The ice treatment helps the vegetables keep their colour and crispiness while being perfectly cooked.

ZPSP-mixed

And when all the water from the melting ice is drained off, you are ready to add the rest of the stuff.

ZPSP-dressing

A simple dressing of lemon juice, red wine vinegar and whole grain mustard, of course with some olive oil, finished the salad.

ZPSP-plated1

I was going to use the salad dressing maker to shake up the dressing. And then realized it would be much quicker to mix it all up with a whisk. Isn’t that often the way it is? You have this wonderful gizmo that will make it all sooo easy, but then you spend more time cleaning up the thing than you saved by using it! Then again, there are some tools in the kitchen that you cannot imagine doing without! It could be fun taking stock of the gadgets and gizmos in our kitchens! Look forward to something on those line here soon!


~Ria


Zucchini and Peppers Salad with Pasta
 
Author: 
Recipe type: Salad
Ingredients
  • 1 cup pasta of your choice, whole wheat preferably
  • 1 green zucchini
  • 1 orange pepper
  • 1 green pepper
  • ½ onion
  • ½ cup cherry tomatoes
  • 1 tbsp red wine vinegar
  • 1 tbsp lemon juice
  • 1tsp whole grain mustard
  • 2 tbsp olive oil
  • Sprigs of basil, pinched into pieces
  • Bowl of ice cubes
  • Salt and pepper to taste
Directions
  1. Cut the zucchini and peppers into bite sized pieces.
  2. Halve the cherry tomatoes.
  3. Slice the onion thinly, crosswise.
  4. Bring to boil a pot of water with salt.
  5. Add the pasta to the boiling water, and cook reducing heat.
  6. After 8 to 10 minutes, based on how well done you want the pasta to be, increase the heat and bring the water to a rolling boil again.
  7. Add the zucchini and pepper pieces and continue to boil for exactly one minute.
  8. Drain in a colander and immediately add the ice cubes to the colander, swirling the colander to ensure that the ice cools the pasta and vegetables quickly and uniformly.
  9. Set aside to drain completely.
  10. Mix together the red wine vinegar, mustard and lemon juice. Add the olive oil and mix thoroughly.
  11. When the pasta and vegetables are completely drained, add the sliced onion and halved tomatoes. Add salt and pepper and mix together.
  12. Transfer to a serving dish and pour the dressing over.
  13. Garnish with basil leaves, and serve immediately, or cool in the refrigerator for later.

A Tabouli Salad with a Difference

Tabouli is one of the dishes that is a definite hit or miss with me. (Is that statement an oxymoron?) I know that tabouli is a parsley-intense dish. Though not a major fan of parsley, I am okay with it… up to a limit. Sometimes the parsley in the tabouli sooo overwhelms everything else that it tastes of nothing else. In such cases, yeah, that polite one spoon is all that I can deal with.

TS-tabouli

But then, this friend of mine – she is from Turkey, where tabouli is a staple – made this amazing version, with cilantro instead of parsley. And boy, did it change everything! Never have I made a tabouli again with parsley. The main difference I feel, is in the texture. Cilantro has this delicate texture whereas parsley tends to be a bit coarse. Even when you manage to avoid even the tiniest stems and use only the leaves.


Another standard ingredient of tabouli is bulghar wheat or cracked wheat. The variety that gets cooked with just hot water poured over it. Recently, I tried using quinoa instead of the wheat. And, found it far superior.

TS-quinoa


Of course, you can spice up a tabouli too. And you can do that in many ways to suit your perfect tastes. A pinch of allspice powder or eastern eight spice will work very well. Or to keep it simple, teaspoon of pickled jalapenos would really add some heat too.
I start by chopping cilantro.

TS-cilantro

Then some tomatoes…

TS-cilantro-tomato

And finally chop some cucumber as well.

TS-cilantro-tomato-cucumber

Plenty of lemon juice and here I used a pinch of eastern eight spice powder.

TS-ingredients-all

The quinoa is prepared the usual way (see recipe below for details).

TS-quinoa1

Then you just keep adding the chopped stuff one by one. There is no particular order; I added tomatoes first…

TS-mixing1

Cilantro next…

TS-mixing2

And the chopped cucumbers last.

TS-mixing3

Generous squeeze of lemon, the spice powder and salt and pepper. And a squiggle of olive oil to top it all. Tabouli salad is ready to serve!

TS-resdy-to-serve

I like it served with a piece of buttered crusty warm bread. The salad tastes so refreshing, especially on a hot summer day!


~Ria


A Tabouli Salad with a Difference
 
Author: 
Recipe type: Salad
Ingredients
  • 1 cup quinoa
  • 1 bunch fresh cilantro leaves
  • 1 large fleshy tomato
  • 1 seedless cucumber
  • 1 large lemon
  • 1 tsp eastern eight spice powder
  • 1 tbsp olive oil
  • Salt and pepper to taste
Directions
  1. Wash quinoa thoroughly, multiple times, till the water runs very clear. Drain and keep aside.
  2. Boil 2 cups of water, adding a pinch of salt.
  3. Add the drained quinoa to the boiling water.
  4. Reduce heat and let cook simmering for 12 to 15 minutes.
  5. Switch off the heat and allow to cool.
  6. Finely chop the cilantro, tomato and cucumber.
  7. When the cooked quinoa has cooled down, add the chopped ingredients one by one and gently mix together.
  8. Squeeze the juice and add it to the quinoa, along with the spice powder.
  9. Add salt and pepper to taste.
  10. Add olive oil to the prepared quinoa, going twice around the bowl.
  11. Mix together and allow to chill in the refrigerator for 30 minutes before serving.

The Day of the Grill

July 4th… if you grill one day in the year, this will be that day! It has become so much a part of the tradition. The weather, the food, the whole atmosphere calls for it. And that is exactly what we did for our dinner on July 4th.

J4D-dinner

The menu was quite simple. To start with, the basic of basics, grilled chicken. A simple marinade of sour cream and tandoori spice mix. Marinated in the fridge for two hours and straight to the grill. As simple as that.

J4D-chicken-kababs

The next item was a bit more complex. Spicy kababs! Cilantro and mint leaves, garlic and onion, and jalapenos, to add that requisite heat.

J4D-kebab-ingredients

Mince all of them finely and add to the chopped meat. However, there is a secret ingredient that gels it all together and makes the meat hold together… baking soda! But you have to be very careful not to overdo it. Just ½ tsp will do for two pounds of chopped meat. Knead the soda well into the meat along with the minced spices. Form into kabab shapes, with or without a skewer, and lay on the grill. Not too much work, but awesome results.

J4D-chicken-kababs2

What is a summer grill without a potato salad! But this potato salad has something special about it… it is made with grilled potatoes! Boil the potatoes till they are just about done, and then lay them on the grill.

J4D-potato-on-grill

They should get a nice char and good grill marks.

J4D-potato-grilled

Mince some red onion. In a bowl, mix together mayonnaise, minced onions, and a spoon of madras curry powder, available in any Indian grocery.

J4D-potato-salad1

Cut the grilled potatoes into bite size pieces and add to the mayo mix. Mix thoroughly and delicious potato salad is ready!

J4D-potato-salad2

Something green… no dinner is complete without something green. Tender cucumbers cut into small pieces and dressed with sesame oil and mirin (available in Asian groceries) was the perfect accompaniment to the spicy meats.

J4D-cucumber-salad

Grilled sweet corn and rolls rounded up the food part. A fresh crisp white wine with a hint of fruit made it all come together excellently.

J4D-fruits

And dessert… we decided against a heavy baked item instead opting for a light fruit salad with ice cream. Especially as this was a dinner being enjoyed outside. Boy, did it look pretty!

J4D-fruit-salad-mix

Mangoes and strawberries cut into pieces, with a splash of lemon juice… and a sprinkling of brown sugar. Do not stir; just keep it in the refrigerator till time to serve. To serve, mix together gently and top with vanilla ice cream in individual dishes.

If you would like detailed instructions for making the items in this meal, including a shopping list for ingredients, do write to ria (at) pepperroute (dot) com.

Hope you enjoy it as much as we did!


~Ria

A Cool Salad with Lemon-Maple Syrup Dressing

Summer is truly here… and the mercury goes up delighting the hearts of all those who have been waiting for just that. That is exactly how the day started yesterday. But by around 10 am, it was evident that the humidity was going up and the day was turning muggy. And my plans for lunch changed suddenly to reflect that reality.

WAS-done1

Don’t get me wrong… I’m not complaining about the weather. I don’t mind at all if the weather is muggy on a weekday, when anyway I have to stay chained to my laptop. The weekends, that is what matters. And the weekends have been glorious so far! Here is hoping that they keep that trend going till the end of the season. Don’t I have a thousand plans for the rest of the summer? 🙂

WAS-wa-me1

Sooo lunch… yes, a salad for lunch; I needed to make a salad for lunch. Not any salad, but a light salad, that feels like a cool breeze. At the same time, it had to have some bulk. Watermelon! One of the fruits that symbolises summer for me. Lightly sweet, taking care of hunger and thirst at the same time. Yes, that will be the base of the salad.

WAS-wa-me2

And some arugula, to counteract the sweetness of the watermelon. The slightly peppery taste of the arugula balances very well with the watermelon. Sliced black olives for an added bit of flavour and thinly sliced white mushrooms to take up the juice. Perfect combo, in flavours as well as colours!

WAS-wa-me3

For the dressing, no oil. A squeeze of lemon, of course. I was about to go with a splash of honey to cut the tanginess of the lemon juice, but then remembered I had an unopened bottle of maple syrup sitting by. It was a present from a friend from Toronto, last time she visited me. Lemon juice and a splash of maple syrup, shaken up together, worked just right!

WAS-ingredients

In case… just in case you would like a bit of heat to add to the fun, include a finely minced pickled jalapeno to the dressing. Adds a good kick, but it is strictly optional.

WAS-done2

A salad that is a feast to satisfy all your senses!


~Ria


A Cool Salad with Lemon-Maple Syrup Dressing
 
Author: 
Recipe type: Salad
Ingredients
  • 2 cups watermelon pieces
  • 1 cup arugula baby leaves
  • 12 black olives, sliced crosswise
  • 2 white mushrooms, sliced thinly
  • Juice from ½ a lemon
  • 1 tbsp maple syrup
  • 1 pickled jalapeno to add some heat, strictly optional
  • Salt to taste
Directions
  1. In a large dish, toss together watermelon pieces, arugula, sliced olives and mushrooms.
  2. Sprinkle with salt to taste.
  3. Transfer to a serving dish and chill in the refrigerator.
  4. Thoroughly shake together the lemon juice and maple syrup (and finely minced jalapeno, if using) to make the dressing.
  5. When ready to serve, pour the dressing over the salad and serve right away.