
Spritz Butter Cookies
Desastre, Katastrofe, Sakuna, Inhlekelele… In how many languages can I say the word ‘disaster’? However many, it won’t be enough to express my sense of frustration… I had this vision of beautiful smooth soft thin buttery morsels decorated with multicoloured crystals of sugar lying on a black plate next to a cup of coffee… And what it all turned out… it’s not that long a story, and let me start at the beginning.
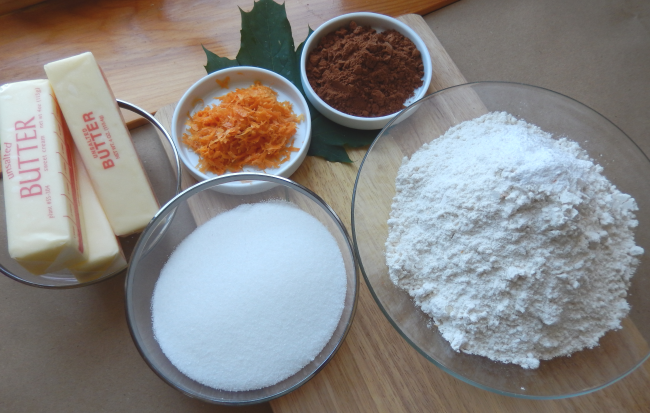
Though I had got a spritz cookie maker as a present, a while back, it is only last week that I decided to try it out. So on a warm Sunday afternoon, I gathered together the ingredients for a classic butter cookie recipe.
Two batches… one orange flavoured and one chocolate. That was my plan. And I would use two different disks for each batch.

I could already see them sitting on a plate, the light coloured with the dark, studded with multi-coloured sugar crystals.

For the first batch – orange flavoured – I selected a simple five petaled flower pattern. Mixed the dough to a nice pliable consistency, filled the cookie maker. Set the oven to pre-heat. Took out the cookie sheet and placed a fitting piece of parchment on it. And started pressing the cookies. Alas… the cookies totally refused to co-operate!
Instead of staying on the cookie sheet and forming a nice shape, the pressed cookie rose with the cookie maker! Every time I pressed it down, the dough came out dutifully, but the cookie refused to stay down… to the point that I had a lump of cookie dough at the end of the cookie maker and a few bits on the cookie sheet! I was aghast! I, who has mastered pinwheels and Florentines and macaroons… failing miserably with some basic pressed cookies!
Setting lamentations aside, I turned my attention to salvaging the situation. After pressing each cookie, I carefully cut it off with a sharp knife. Okay, now I can see the flower shape and there are cookies on the cookie sheet.

The first batch came out of the oven… and to my great relief, they tasted good.

And in a rustic way, the cookies looked good too. A pinch of sugar crystals while they are still hot on the rack, made them actually look pretty smart.

Somehow, with the workaround, I was able to finish making the cookies, though it took a bit of time. Of course, I had to abandon the idea of the second batch of chocolate flavoured ones. No sense in lengthening the misery, right?

After all the cookies were done and photographed and distributed to friends (along with the story, of course!), I still was wondering what went wrong. And I went back to the directions that came with the cookie maker. The instructions were to use an ungreased cookie sheet. And it struck me right away… no wonder the cookies were not staying down on the sheet! They were supposed to stick to the sheet and here I was pressing the cookies on parchment that nothing sticks to! That was one moment when I felt the need for some facility to kick oneself… 🙂
~Ria

- 3 cups all-purpose flour
- 1 teaspoon baking powder
- A pinch of salt
- 1½ cups butter, softened
- 1 cup granulated sugar
- 1 egg
- 2 tablespoons cream or milk
- 1 tsp vanilla extract
- 1 tsp orange essence
- 1 tbsp orange zest
- Preheat oven to 350º fahrenheit.
- Sieve together flour, baking powder and salt.
- In a mixing bowl, beat the butter and sugar till light and fluffy.
- Add the egg and beat thoroughly.
- Add the cream (or milk), vanilla extract and orange essence.
- Add the orange zest and combine well.
- Add the flour to the mix, in batches, and mix well, gently. The dough should be pliable but not too loose. Do not chill the dough.
- Insert the pattern disk you want to use in the cookie maker and tighten the bottom.
- Fill the cookie maker with the dough and attach the top.
- Place the bottom of the cookie maker on an UNGREASED cookie sheet, and press down to shape the cookie.
- Lift up and repeat the process. The cookies can be placed at a distance of one and a half inches.
- Bake till the edges of the cookies turn light brown. This will take 10 to 12 minutes.
- Place the cookies on a cooling rack and sprinkle the center of each cookie with coloured sugar crystals.
- Store in airtight containers when completely cool.