Appetizer

The Truly Wonderful Scotch Eggs

The word ‘Scotch’ is invariably associated with Scotch whiskey, and the age-old distilleries of Scotland. However, there are many more products that are associated with the word, like Scotch tape, Scotch bonnet chillies and the wonderful Scotch eggs!

SE-done

By the way, the Scotch bonnet chillies are named so only for their shape resembling the traditional Tam o’ Shanter hat of Scotland; they are not grown anywhere near Scotland!
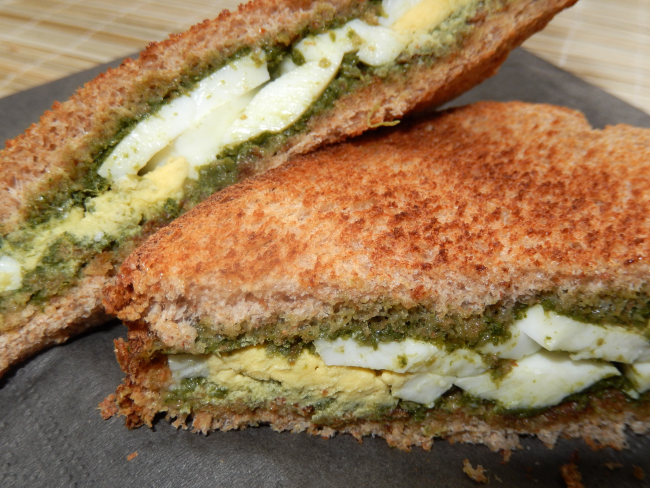
The best thing about Scotch eggs is that it is a meal in itself. Add a green salad of any kind, and you have a well balanced meal.

SE-closeup

Scotch eggs are commonly a party and picnic food item and has existed for a long while, with a British department store claiming to have invented it in 1738. The all-knowing Wikipedia speculates that the inspiration for the dish came from the ‘Nargisi kofta’ of the Mughal cuisine.

SE-eggs

Though the initial versions were made from sausage meat you can make them with any chopped meat. If you do not fancy red meat, minced turkey or chicken, or a mix of the two, will work equally well.

SE-ingredients

My version of a Scotch egg is a truly fusion one. I use the eastern eight spice powder, along with ginger and garlic, to add flavour and a little bit of red chilli powder for heat.

SE-breadcrumbs

The breading process becomes very easy if you do it assembly line style, with three shallow bowls set up with the flour, egg wash and breadcrumbs.

SE-done2

Though a bit time consuming to make, Scotch eggs are worth the trouble. Not only do they taste good, they look great too!

SE-plated

The concept of hardboiled eggs covered in meat and fried or baked is popular in many cuisines. In addition to the Nargisi kofta mentioned earlier, Kwek-Kwek, made with quail eggs and Tokneneng made with chicken or duck eggs, both from Philippines, are dishes very similar to Scotch eggs.

~Ria


The Truly Wonderful Scotch Eggs
 
Author: 
Recipe type: Appetizer
Ingredients
  • 6 eggs
  • 2 lb chopped (minced) meat of your choice
  • 2 medium red onions
  • 4 cloves garlic
  • 1 inch piece ginger
  • 3 medium potatoes
  • ½ tsp red chilli powder
  • 2 tsp coriander powder
  • 1tsp eastern eight spice powder
  • 1 small bunch cilantro
  • 1 cup breadcrumbs
  • ½ cup all purpose flour
  • 1 egg
  • Vegetable oil
  • Salt to taste
Directions
  1. Hard boil the 6 eggs. Shell them and keep aside.
  2. Finely chop the onions, ginger and garlic.
  3. Discard the stems of the cilantro and chop the leaves.
  4. Boil the potatoes till soft. Peel them and keep aside.
  5. Heat 2 tablespoons of vegetable oil in a frying pan and sauté the onions.
  6. When the onions turn transparent, add the chopped ginger and garlic.
  7. Continue to sauté till the onions start to brown.
  8. Add the coriander powder and stir together.
  9. Add the chopped meat and mix well.
  10. Add salt to taste.
  11. Reduce the heat and cook covered, till the meat is cooked. Add ladlefuls of water, if required.
  12. When the meat is cooked and all water is evaporated, add the chilli powder and eastern eight spice powder.
  13. Mash the boiled potatoes and add to the meat mix.
  14. Add the chopped cilantro and mix thoroughly.
  15. Remove from heat and allow to cool.
  16. Place the flour in a shallow bowl and season with salt.
  17. In another bowl, beat the egg with an equal quantity of cold water.
  18. Place the breadcrumbs in a third bowl.
  19. When the meat mix is cool, divide it into six portions.
  20. Form each portion into a ball, make a depression in the middle and place a boiled egg into it.
  21. Cover the egg completely with the meat mix, trying for an even thickness all around.
  22. Form into a oval shape and keep aside.
  23. Prepare all 6 eggs similarly.
  24. Roll each covered egg in the seasoned flour and then in the beaten egg, and finally in the breadcrumbs.
  25. Brush off the extra breadcrumbs and keep aside.
  26. Prepare all 6 eggs similarly.
  27. Heat a sufficient quantity of vegetable oil in a deep pan.
  28. When the oil is hot, add the prepared eggs one at a time and gently fry till evenly browned.
  29. Drain on a paper towel.
  30. Cut into two lengthwise and serve with a salad as a light meal.


Warm Three Bean Dip

Though the name refers to a dip, this actually is not a dip. The only apt word I can think of is ‘scoop’. Instead of dipping your chip into something, you are scooping something with your chip. You get the idea!

WTBD-closeup2

Beans are one of the most ancient crops consumed by human beings. Historical evidence points to its consumption in regions widespread in Asia and South America, starting 7th millennium BC. Actual cultivation started later in the 2nd millennium BC. Today, it must be one of the most common staples present in all cuisines around the world.

Strictly speaking, beans like fava beans (broad beans) belonging to a particular species can be called ‘beans’, but in modern usage, the word has become a synonym for pulses or legumes as well. Then there are other thing being called ‘beans’ though they are in no way connected to the actual beans. Examples are coffee bean, vanilla bean, coco bean, etc.

WTBD-plated2

The beans’ claim to fame is that it is the chief food item that meets the protein requirements of vegetarians. According to nutrition experts, beans are comparable to meat in terms of calories, but far superior when it comes to fiber and water content. One cup of cooked beans provides about 12 grams of fiber, while meat has none. In addition, beans are high in antioxidants, and are good for digestive tract health.

WTBD-ingredients

Instead of the particular varieties of beans used here, you can choose any of your liking.

WTBD-grinding

The molcajete goes well with the ancient crop of beans as it is also an ancient tool. It was in use during the times of the Aztec and Maya cultures. It is carved out of a single block of basalt stone. Comes in very handy in the kitchen.

WTBD-plated1

Despite all the good it does, beans have this unfortunate blemish on its reputation due to its tendency to produce flatulence, giving rise to numerous stories and jokes. Soaking in water to which a pinch of baking soda has been added, or cooking with spices like coriander and cumin are supposed to overcome this problem. Again, in my opinion, moderate quantities will not cause any such problems.

WTBD-closeup1

The dip or scoop is served best with sturdy tortilla chips. And, if you like to spice it up a bit, try it with pieces of pickled jalapeno on the side… truly kicks it up a notch. A quick lunch or a snack, with hardly any effort!

~Ria


Warm Three Bean Dip
 
Author: 
Recipe type: Snack
Ingredients
  • 1 cup butter beans
  • 1 cup red kidney beans
  • 1 cup black beans
  • 2 cloves garlic
  • 1 tbsp olive oil
  • 1 lime
  • 1 bunch (4 or 5) scallions
  • 1 bunch cilantro leaves
Directions
  1. If using the cans of already cooked beans, drain and wash the beans. If using dry beans, soak them for 6 hours ahead of time and boil them.
  2. Thinly slice the scallions and cilantro leaves.
  3. Juice the lemon.
  4. Using a molcajete (traditional grinding stone from Mexico), crush the garlic cloves. If you do not have a molcajete, you can use any other means for the crushing.
  5. Add the three beans and crush them, along with the garlic. It is not necessary to make each bean into a paste; a rough crushing will do. It is good to leave a few whole beans uncrushed.
  6. Scoop out the crushed beans into a serving dish.
  7. Add the olive oil, lime juice, and salt, and mix well.
  8. Add the sliced scallions and cilantro and blend in.
  9. Keep aside for 30 minutes at room temperature for the flavours to meld.
  10. Serve with tortilla chips and crackers to scoop.


Kicked Up Potato Skins

You go to any news site or open any newspaper… there is at least one article on some scientific research which apparently proves that some food item or other is bad for you, healthwise. Go to the same web site, open the same newspaper a month later and you will find reports of another research project which proves the exact opposite. And if you pay attention over time, this cycle will repeat itself over and over, for sure.
 
Take the case of butter. More butter, better food… that was the motto of the times of Julia Child. Then came the butter police with their cautionary tales and scary statistics. Research was quoted linking butter directly to high cholesterol, leading to heart health problems. Today? Today the cycle has come full circle… to the conclusion that butter, in fact, is good for you, particularly for your heart! 🙂
 
Another case in point is that of potatoes. At one time, it was believed, based on “scientific research” that the skin on the potato contained toxins. So users were advised to peel the potatoes diligently. Then, later came research with the findings that the potato skin is loaded with potassium and iron and niacin and all kinds of goodies, in addition to essential fiber! That is where the situation stands now. Will it change again? Who knows, we can only guess!
 
I personally find all this a bit amusing. And if the dish I’m planning to cook with potatoes will be better with skins, I keep them on; otherwise peel them. I keep it that simple.
 
KUPS-closeup

So the other day, when the craving for potatoes hit me, as it does every so often, I chose to do a combo – a dish of potato skins stuffed with goodies. And what did I do with the scooped out potato flesh? That is a topic for another day! 🙂
 
Starting with nice mealy large potatoes is the key to arriving at potato skins worthy of being stuffed. And smear them with some salt before baking to get the skins tasting even better. Out of the oven, just slice them and scoop out the flesh.
 
KUPS-potatoes

I used a simple mix of some veggies along with black beans and corn for the stuffing. Actually, you can try any of the combinations that you have used elsewhere. One of these days, I’m going to do a chopped meat version; should be yum.
 
KUPS-ingredients

Just chop up the vegetables and saute them all together.
 
KUPS-chopped

And for the sauce, I used a bit of soy sauce, sriracha and some mixed herbs. This mixed herbs is a staple in my house. I grow herbs like rosemary, thyme, sage and such, during the summer and fall, on my window sill. When the weather gets too cold for them and they start kind of drooping, I harvest them all and put into a warm oven to get slow dried. Crush them all together when perfectly dry and you got a year’s worth of fragrant herbs. Store them in an airtight container on the door of the freezer.
 
KUPS-sauces

So you just cook the ingredients all together…
 
KUPS-cooking

And pile them up in the potato skins.
 
KUPS-stuffed

And top them with some shaved melting cheese.
 
KUPS-cheesed

Place under the broiler for 5 minutes and you have the perfect combo of a gooey cheese melt in a crispy outside.
 
KUPS-full-plate

Serve with thinly sliced peppers and mini greens.


~Ria


Kicked Up Potato Skins
 
Author: 
Recipe type: Snack
Ingredients
  • 3 large potatoes
  • 1 + 2 tbsp vegetable oil
  • 1 red onion
  • 2 ribs celery
  • 3 cloves garlic
  • ½ green pepper
  • ½ orange pepper
  • 1 cup black beans, from a can
  • 1 cup corn, from a can
  • 1 tsp sriracha sauce (or any other chilli sauce)
  • 2 tsp soy sauce
  • 1 tsp mixed herbs of your choice
  • Chedder cheese shavings to tp
  • Salt and pepper to taste
Directions
  1. Pre-heat the oven to 350 degree farenheit.
  2. Smear the potatoes with 1 tsp of salt and the vegetable oil.
  3. Place them on a baking sheet and bake in the preheated oven for 50 minutes to an hour, till done.
  4. Allow them to cool outside the oven.
  5. Chop the onions and celery into small pieces.
  6. Slice the garlic thinly.
  7. Slice the peppers into thin long strips.
  8. Drain the beans and corn and keep aside.
  9. In a pan, heat 2 tablespoons of oil.
  10. When the oil is hot, add the onions, celery and garlic.
  11. Sauté them till transparent.
  12. Add the black beans and corn to the mix, along with enough salt, and stir well.
  13. Add half the sliced peppers and the sauces and herbs to the mix.
  14. Mix well and take off the heat.
  15. When the potatoes are cool enough to handle, cut them in half lengthwise.
  16. Scoop out the flesh from the inside, leaving a quarter inch border all around, forming a shell.
  17. Set the oven on Broil.
  18. Divide the prepared vegetable mix among the potato shells.
  19. Top with shaved cheese and keep under the broiler for 5 minutes.
  20. Serve on a platter garnished with the rest of the sliced peppers and mini greens.

Green Egg Sandwich

Not exactly… I mean, the eggs are not green, but the sandwich is! A lovely green chutney is the secret behind this delicious sandwich which can be made in a jiffy.

GES-sandwich-closeup

When it comes to sandwiches, I totally agree with John Montague, the 4th Earl of Sandwich, who is credited with its creation in the first place. The story goes that reluctant to get up from the card table – apparently, the man took his gambling seriously – he would ask his servants to hand him a piece of meat between two slices of bread so that his fingers would stay clean. Naturally, the other players at the card table started asking for the food item ‘same as sandwich’ which soon got abbreviated further and the dish named sandwich was born!

Here the role of the bread is just to hold the goodies inside (which function I get lettuce leaves to do as well, very often). And whatever interesting and tasty food that keeps its shape can be placed inside a sandwich. If you are not sure whether the filling will stay inside the bread, just toast it to keep it all together. 🙂

GES-sandwich-done1

I have tried out a lot of combinations of fillings and flavourings for sandwiches, over time. One combination that has been a great hit with many of my friends is a variation of the traditional vegetable sandwich with green chutney. Just replace all the vegetable fillings with slices of boiled eggs, keeping the green chutney part intact. Viola, you have cut down the effort and time to less than half while ending up with a sandwich that is even more tasty!

GES-chutney-butter2

So the other day, when I wanted some sandwiches to take on a day trip, that is what I decided to make. And it did come out pretty good, if I say so myself! 🙂

Making the chutney is the only task that takes a bit of time. Or rather getting the ingredients for the chutney together.

GES-ingredients1

Once you have assembled the stuff, just grind them all together and you have the chutney ready.

GES-ingredients2

Next comes the bread. Unless a recipe definitely calls for white bread, I go for whole wheat. Especially as that is the bread that I always have on stock. You should toast the bread slices for this sandwich as it adds to the flavour.

GES-bread-butter

Butter both the bread slices, on one side of course, for a sandwich before applying the chutney. The barrier of fat is required to prevent the chutney from totally soaking into the bread and making it soggy.

GES-chutney

After the butter, the chutney goes on. Rather thickly. Actually, how much chutney will depend on your preferences.

GES-chutney-egg

Then just layer the slices of the boiled egg over the chutney on one slice of bread. I used an egg slicer to do the slicing, but it can easily be done with a knife.

GES-sandwich-done2

Place the second buttered and chutneyed bread slice over the egg and press down a bit. The chutney will hold it together well. There is no need to toast the sandwich as the bread has been toasted already.

As a quick lunch or snack to go, an ideal sandwich. Enjoy!


~Ria

Green Egg Sandwich
 
Author: 
Recipe type: Sandwich
Ingredients
  • 1 big bunch of cilantro
  • 2 tbsp scraped coconut
  • ¼ white onion
  • ½ inch piece ginger root
  • 1 clove of garlic
  • 1 green chilli
  • 1 tsp tamarind paste (can be replaced with 1 tbsp lemon juice)
  • ½ tsp sugar
  • Salt to taste
  • 3 eggs
  • 6 slices of whole wheat bread
  • Unsalted butter
Directions
  1. Clean the cilantro and remove all hard stems.
  2. Slice the onion into thin wedges.
  3. Slice the ginger, garlic and green chillies.
  4. Boil the eggs and shell them.
  5. Grind together the cilantro, coconut, onion, ginger, garlic, green chillies, tamarind, sugar and salt together in a blender till smooth. If required, you can add a spoonful of water.
  6. Transfer to a dish and keep aside.
  7. Toast the bread slices.
  8. Apply butter on one side each of all the bread slices.
  9. Apply chutney on the buttered side of the bread slices.
  10. Slice the boiled eggs and place the slices over the chutney.
  11. Cover with the second slice of bread and press down a bit.
  12. Sandwiches are ready!